web analytics

Browsed by
Category: decorating

Paint me a picture!

Paint me a picture!

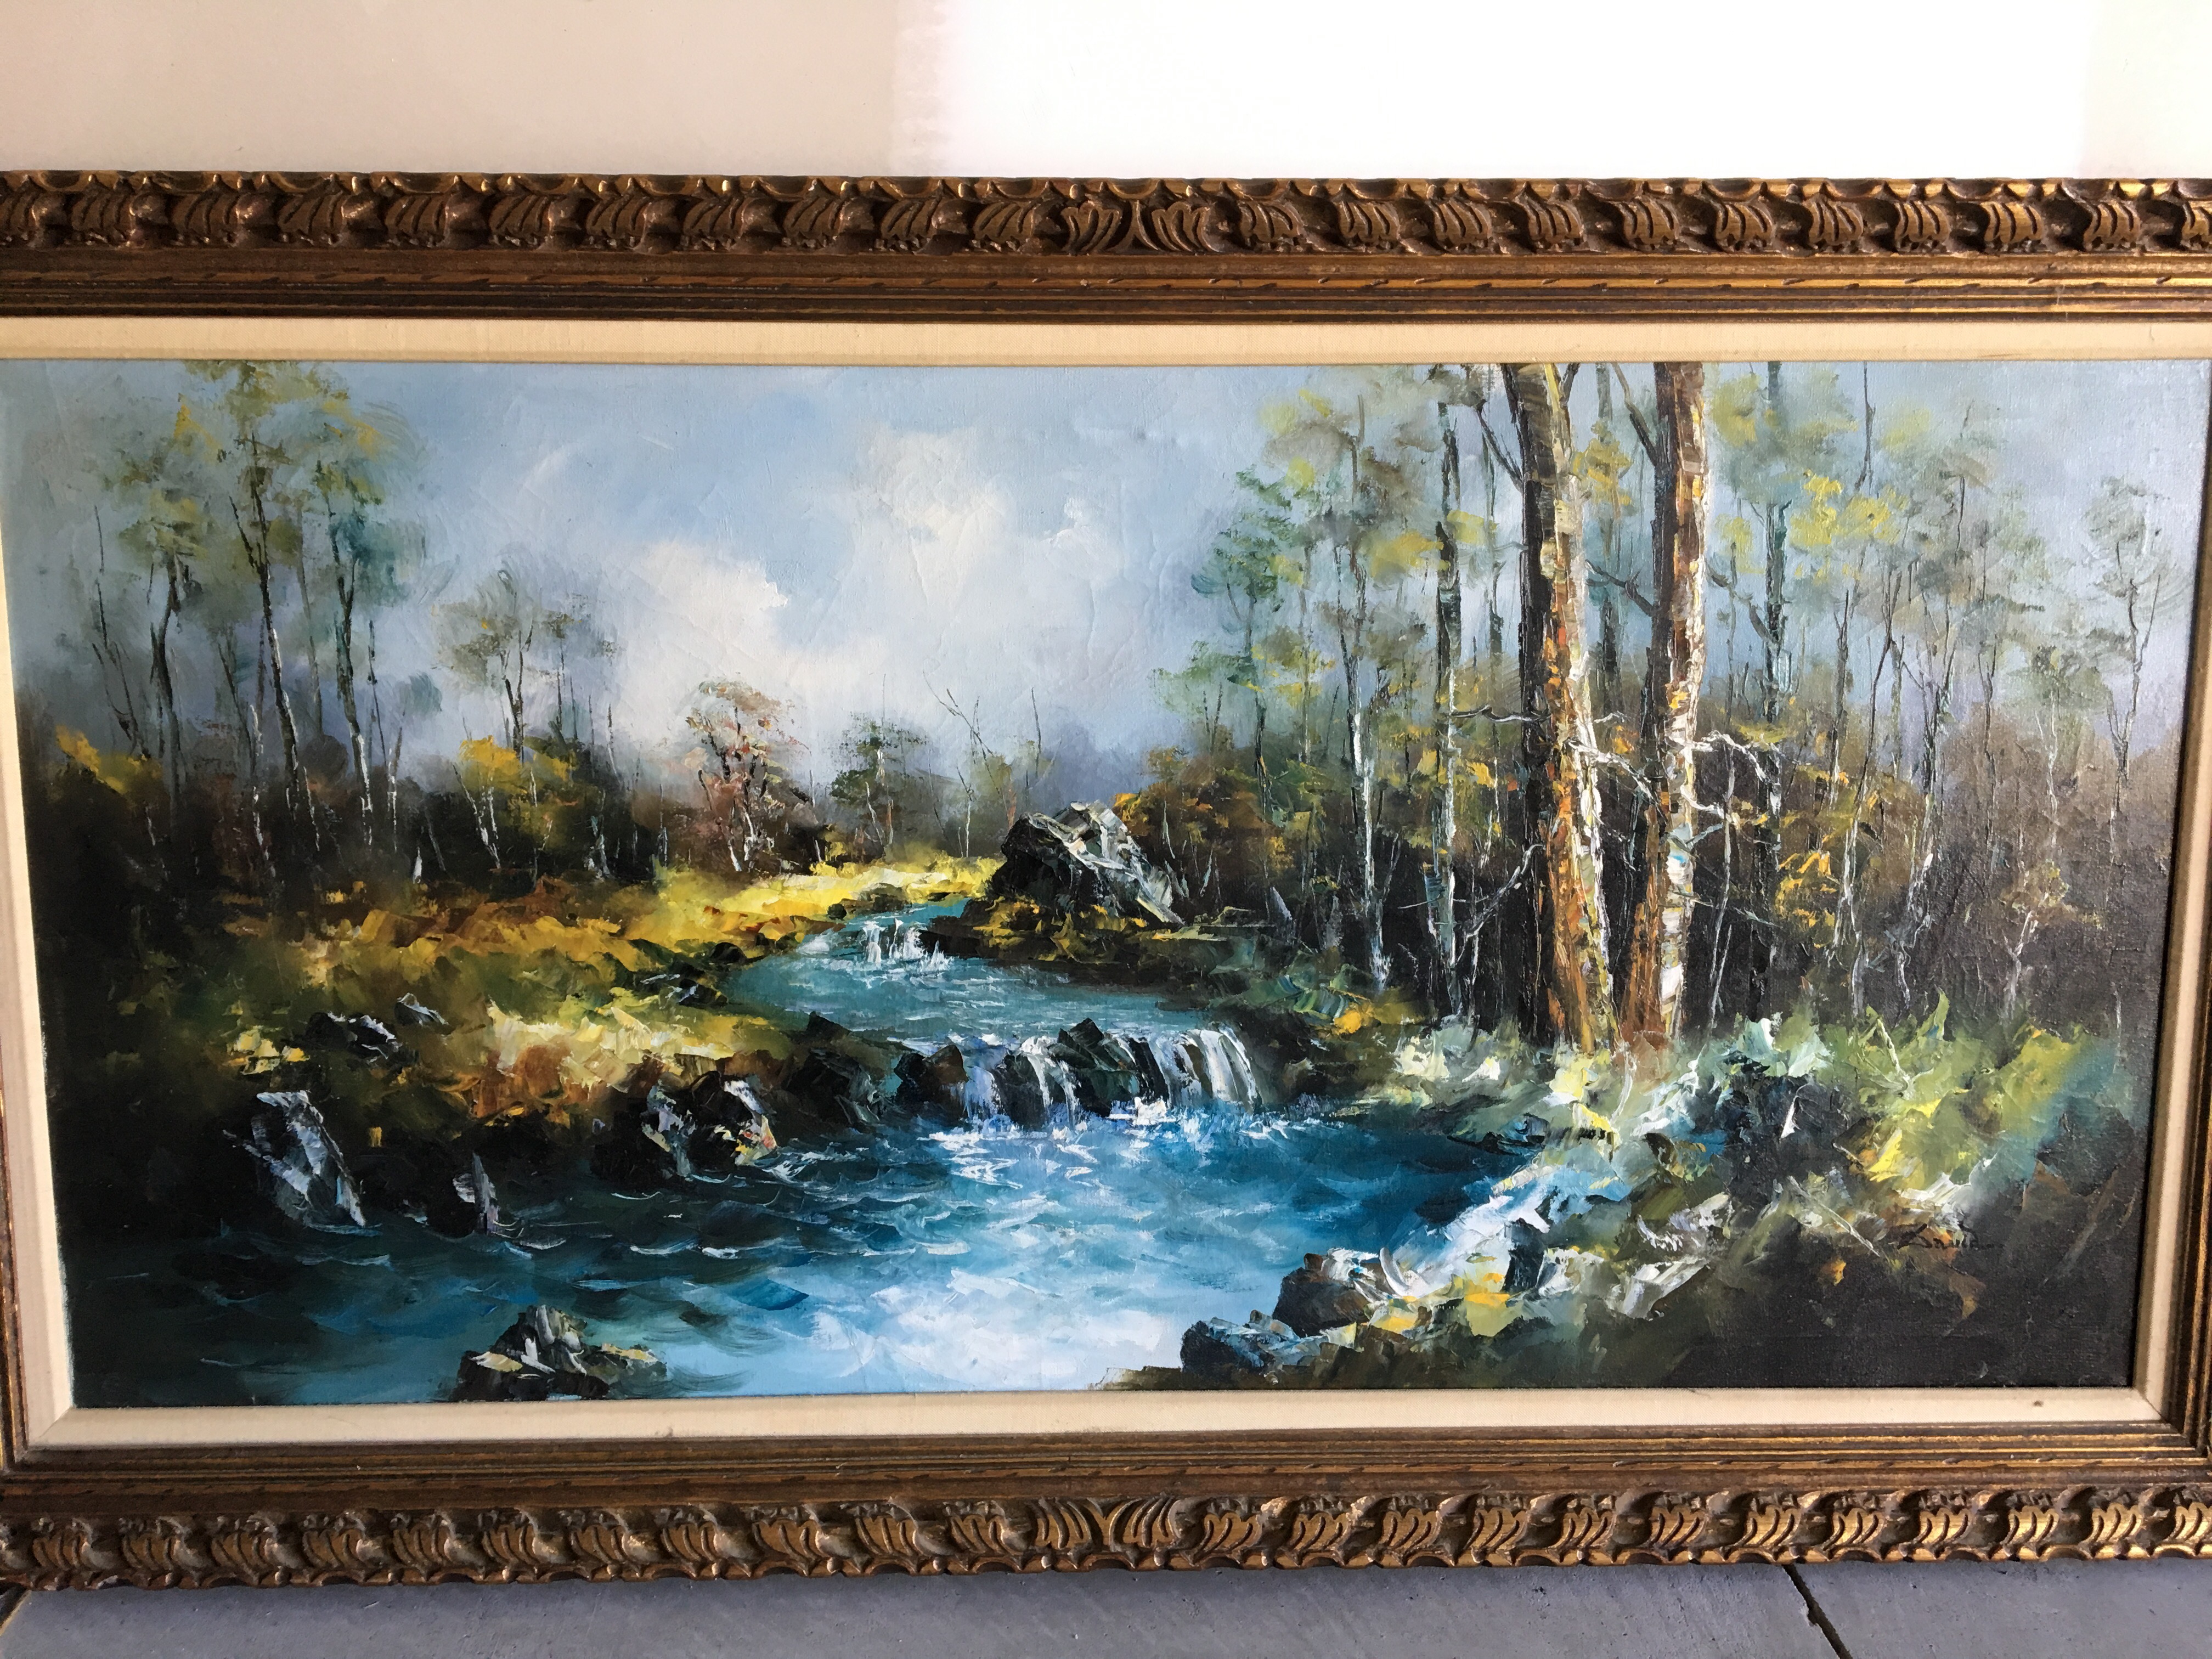
Okay, so last week I posted the pic I bought at our neighborhood yard sale.  The plan, paint over the original canvas (pray it wasn’t priceless) and update the frame.  I really had no clue how long something like this might take.  Honestly, I kind of thought it might take me a while.

Before

Saturday morning while Matt was out golfing, I decided to start painting and see what happened.  I made a makeshift painting station in the garage.  One side has a small ledge a few feet up and a couple inches wide so I tape a sheet to the wall and was able to prop the canvas up on the ledge.  From there I just started mixing colors.  Originally I wanted to go more grey but my paint turned a little more green so I just ran with it.  I started off with my brush just mixing colors on the canvas.  (Really I should have put a white layer on first but I knew I didn’t have enough paint for that.)  So I just kept going, mixing paint and brushing it on.

During

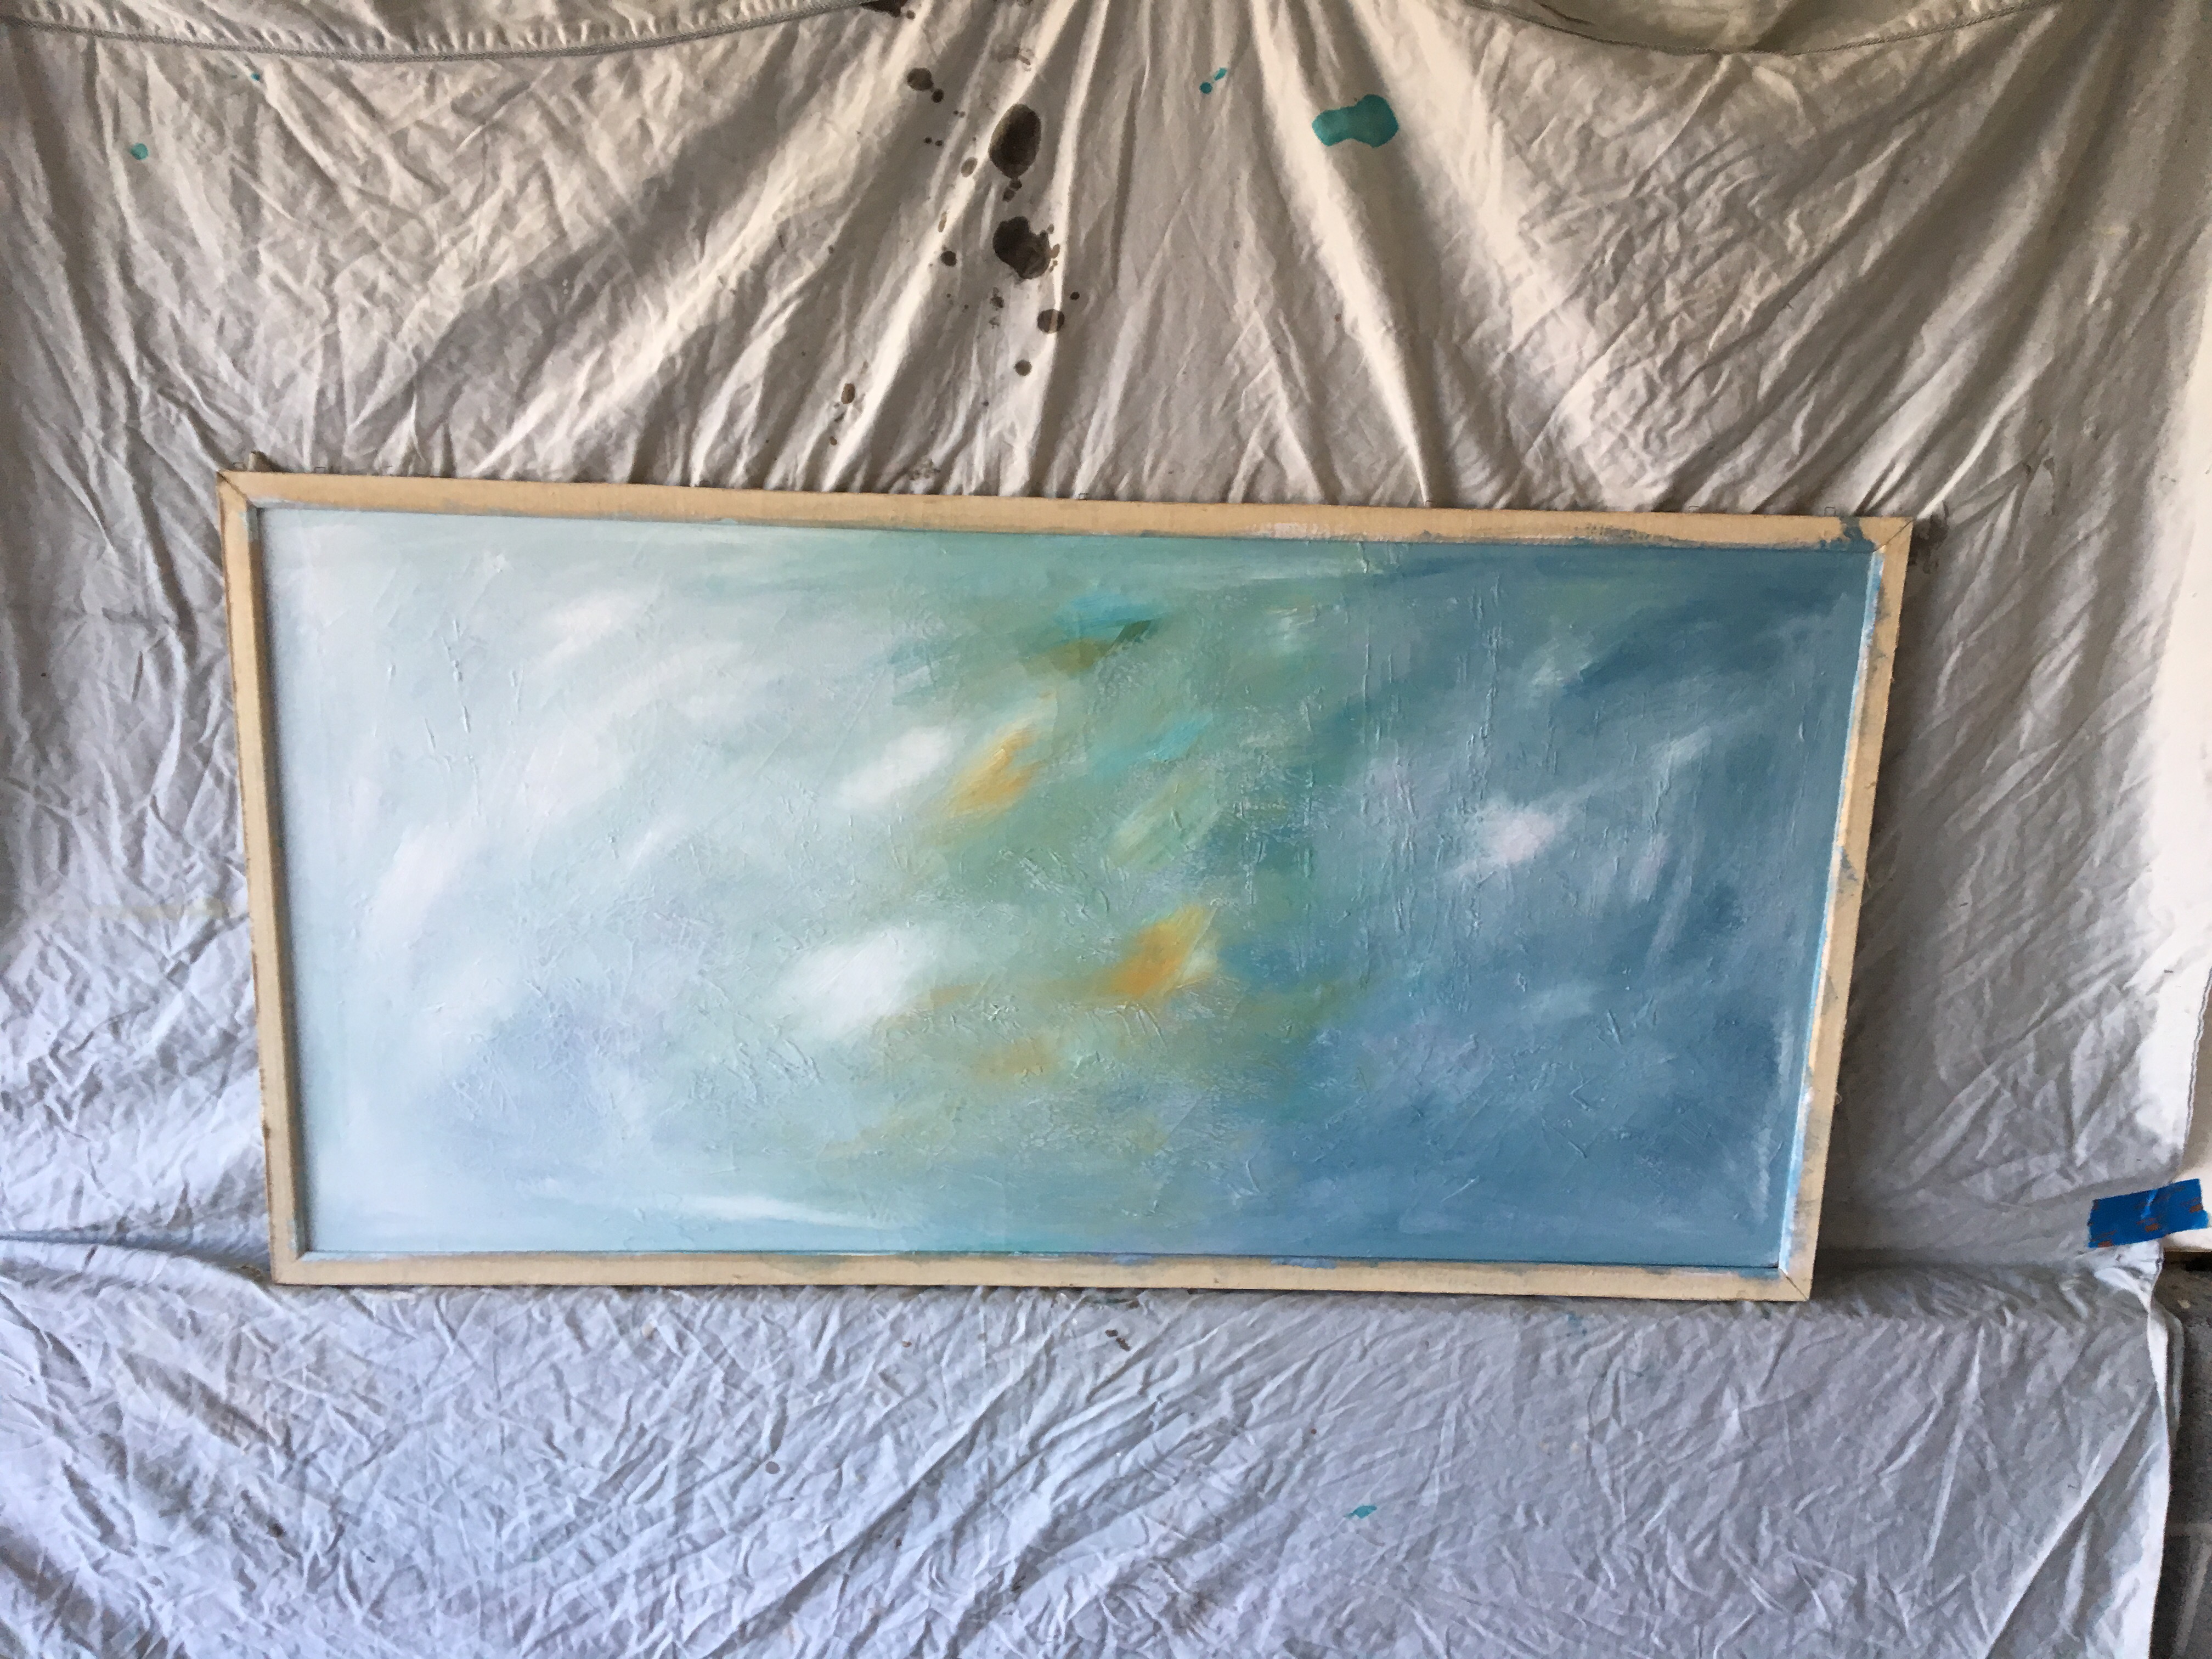
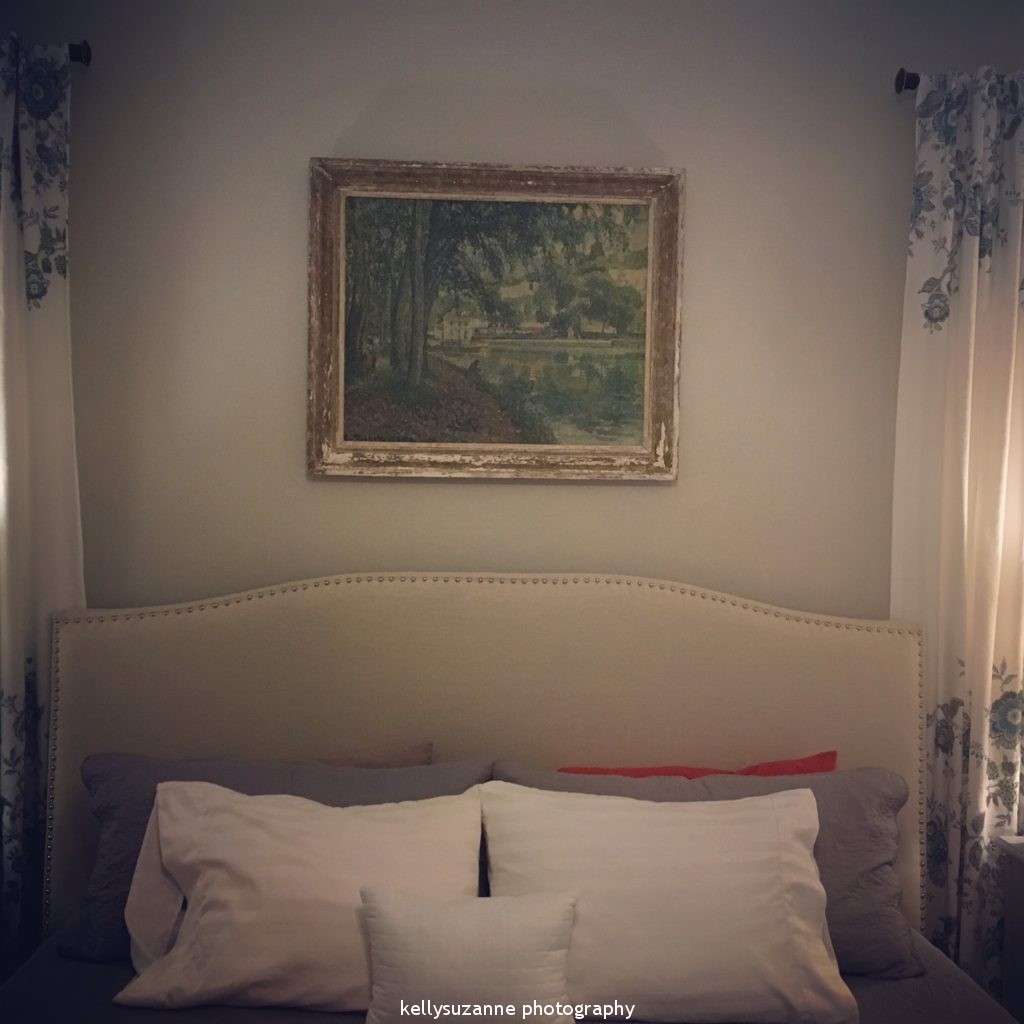
Once I had the whole canvas covered, which didn’t actually take more than 15-20 mins.  I stepped back to check out what I had.  It wasn’t bad!  I liked the color gradients, so I grabbed a palette knife and started building the colors on the canvas.  At this point I was just mixing the colors together with the palette knife and swiping it on the canvas. And it looked pretty good.  Once the majority was done, I realized I needed to add a little bit of coral, since the bedroom is basically coral and white! 😉  A little red, yellow, pink and white and I had something that resembled coral.  I had no clue really where I wanted to add it and decided on a to just put it near the bottom and hope it didn’t look dumb.  It turned out pretty good and is really only a small touch of color.  After that I was done!
I texted a few people pics of it and they all thought it looked good.

This is upside down. I couldn’t decide which way I was thing to hang it.

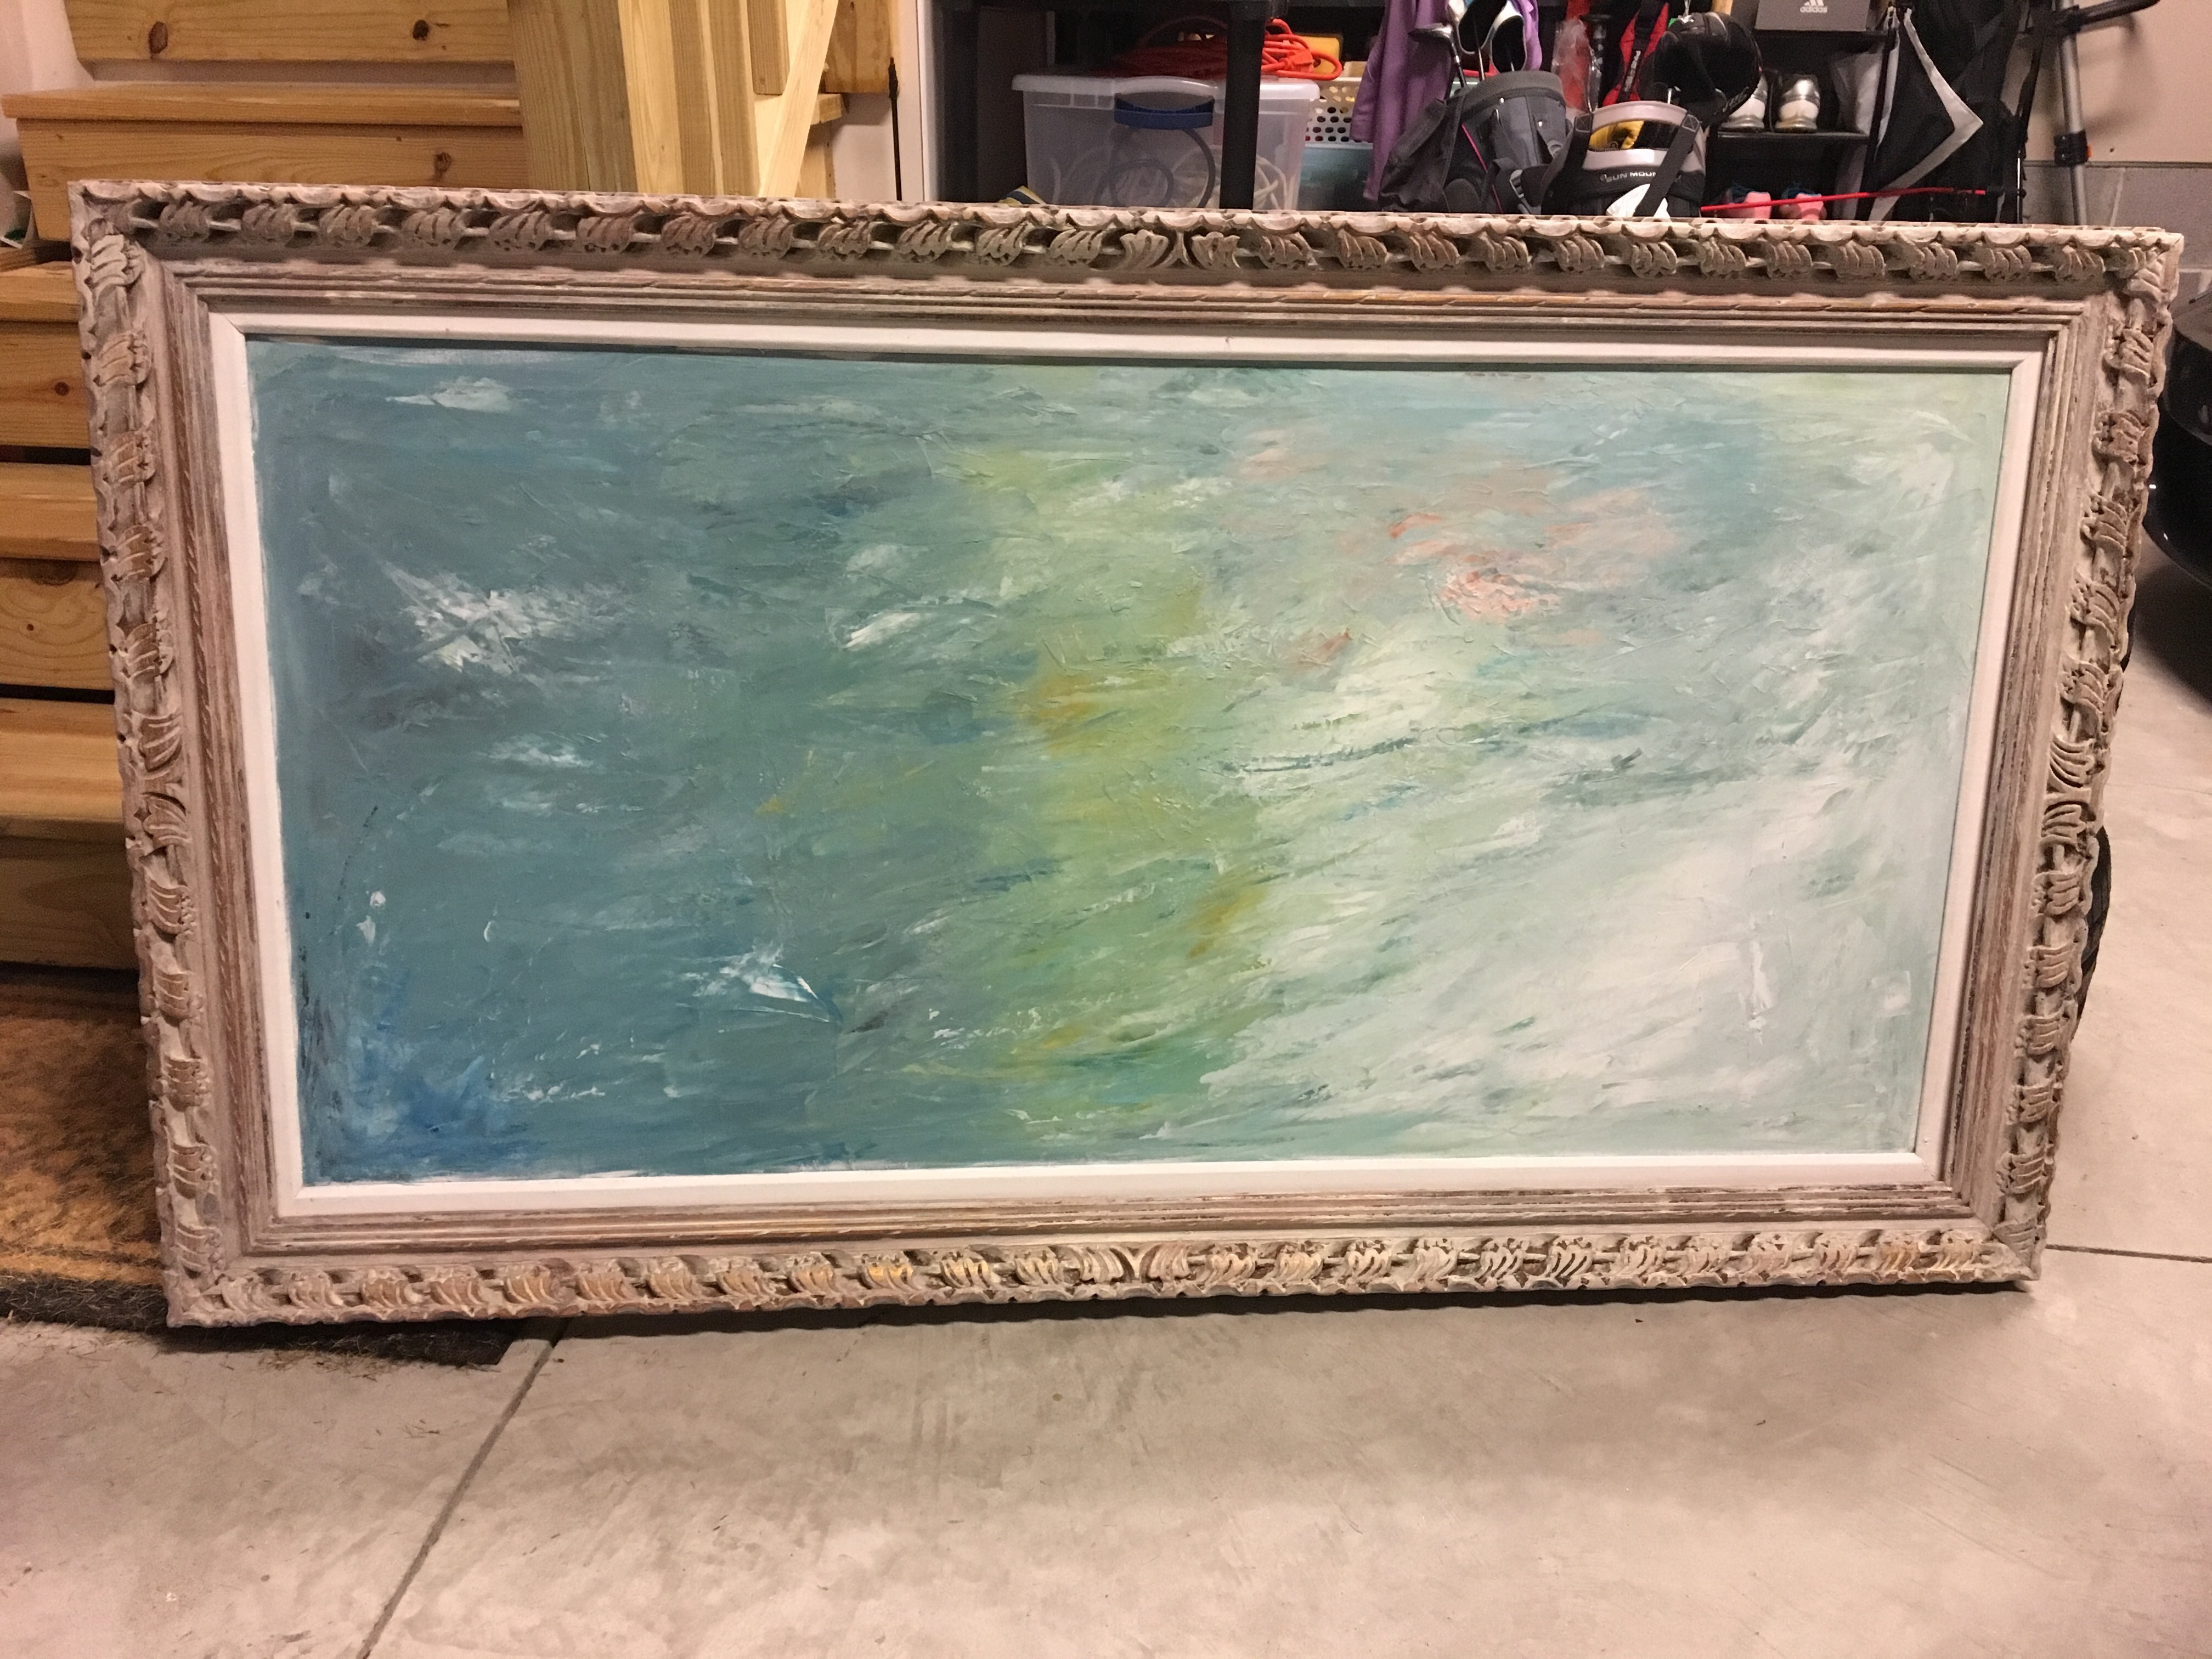
Later that afternoon I decided I was going to work on the frame.  I ran up to my craft room and grabbed some rose gold and off white paint.  I used the rose gold to neutralize the brassy yellows currently on the frame.  Then I mixed my off white with a bit of titanium white and added water.  Lots of water.  It was kind of messy but the result was a nice, worn looking frame.  (I will say, the titanium white really wasn’t needed.)  The last thing I had to do was paint the outer edge of the canvas.  In hindsight, I probably should have painted that white first and then taped it off but I didn’t do that. I had to very carefully paint white around the edges of my newly painted canvas.  In the end, I ended up with a little more white here and there but I didn’t really mind the way it looked so I just left it.  I did go back and try to fix one corner of the canvas I wasn’t super happy with.  It was a little flat.  I can’t say it helped but it didn’t hurt it either.  Just added a little more color and texture.

I let everything dry overnight and Sunday morning Matt helped me reattach the canvas to the frame. Then I got up the nerve to actually sign it.  It was really stressful. 😉  But I got my name on the corner and it doesn’t look awful.

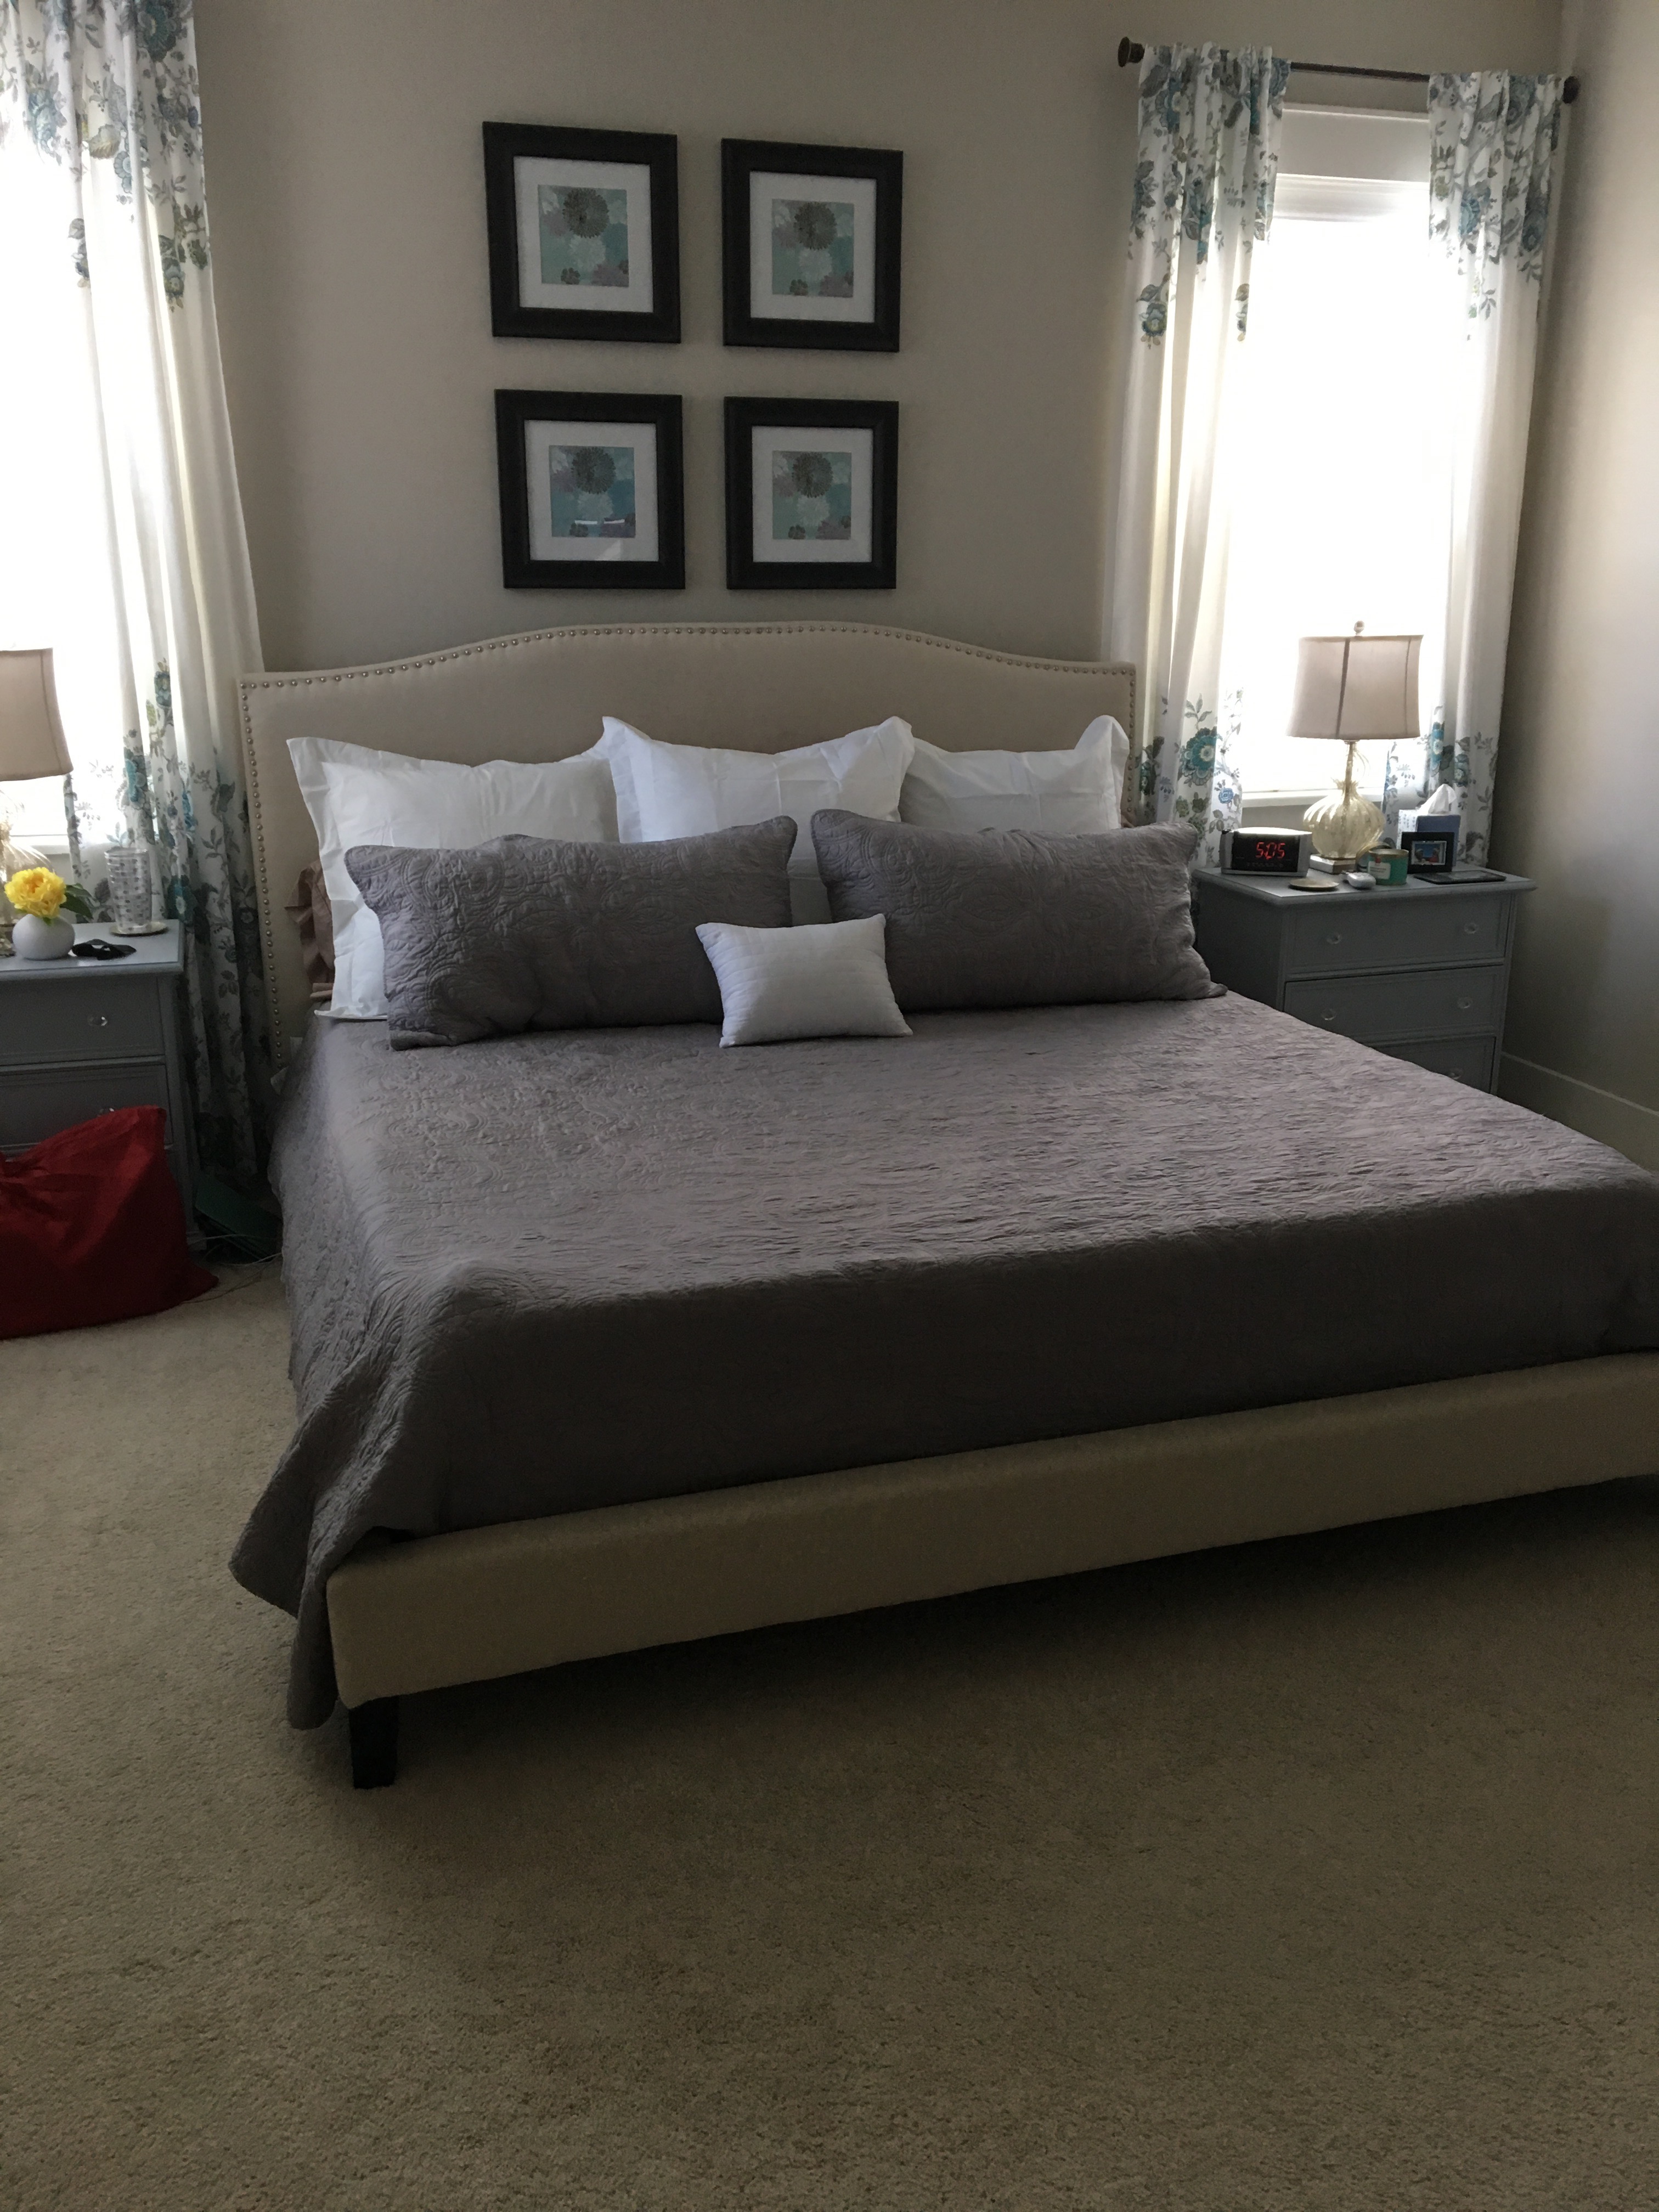
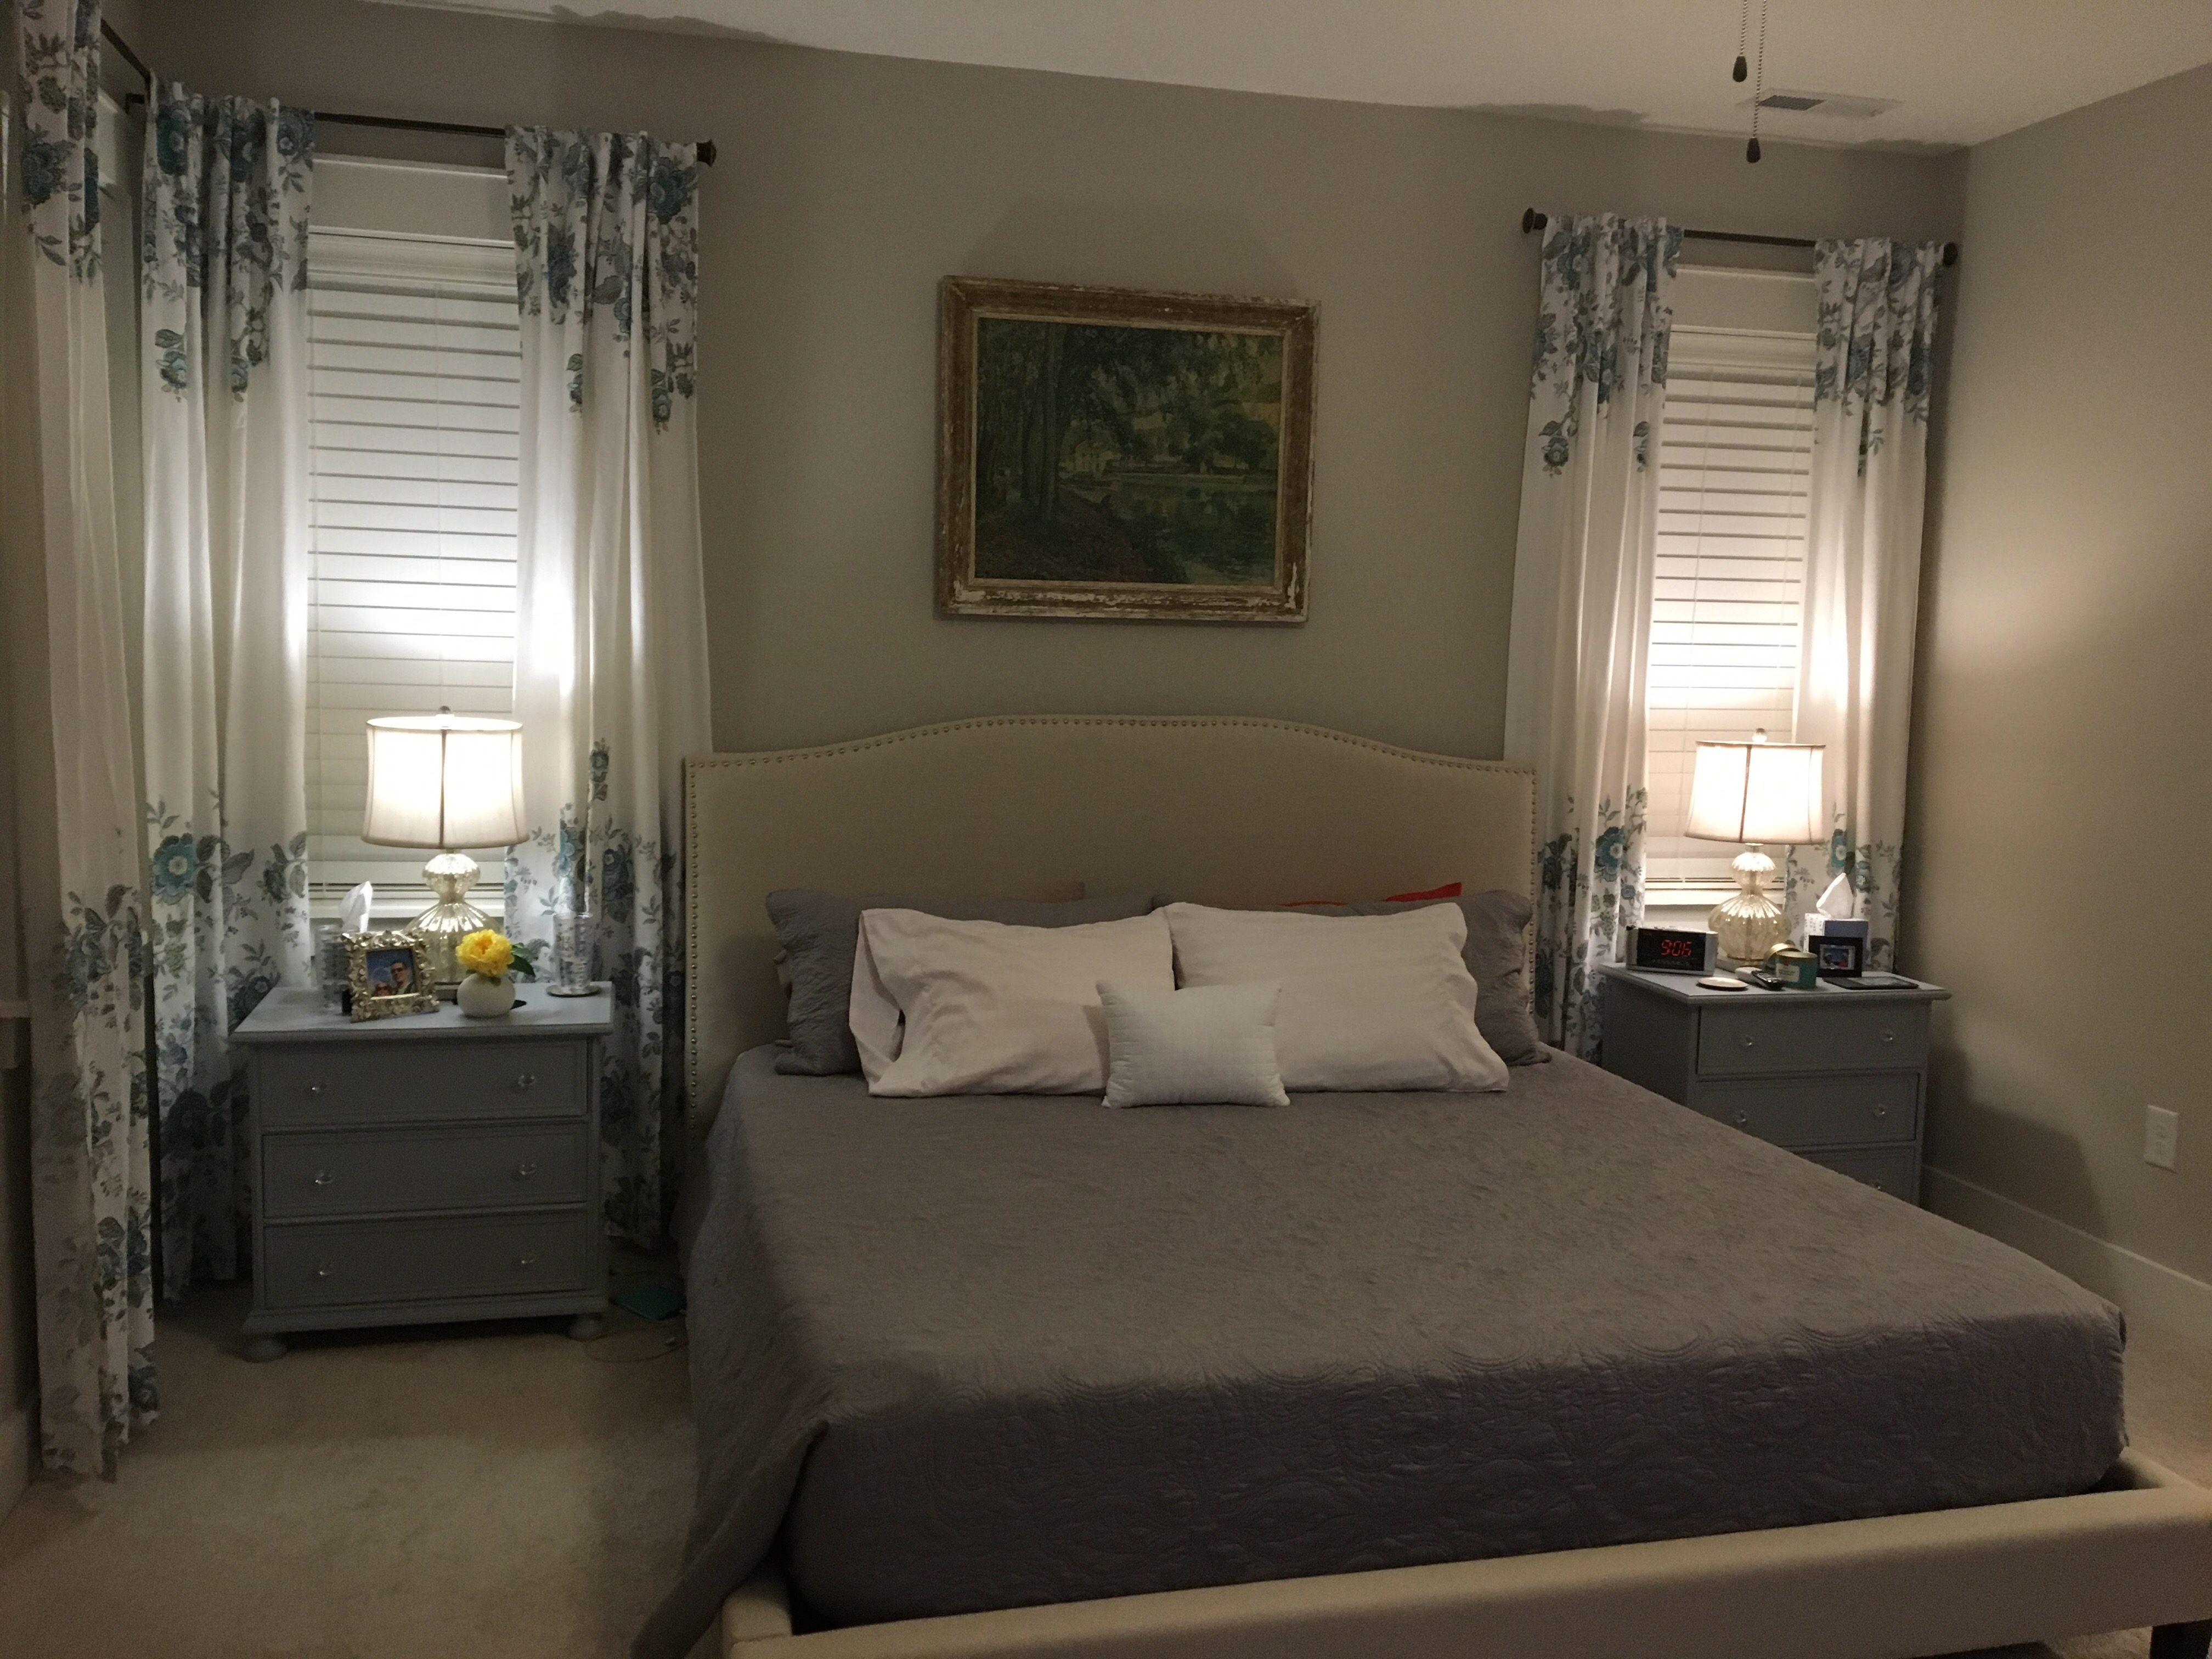
Now it’s hanging over the bed in our guest room!  I think it turned out really good!
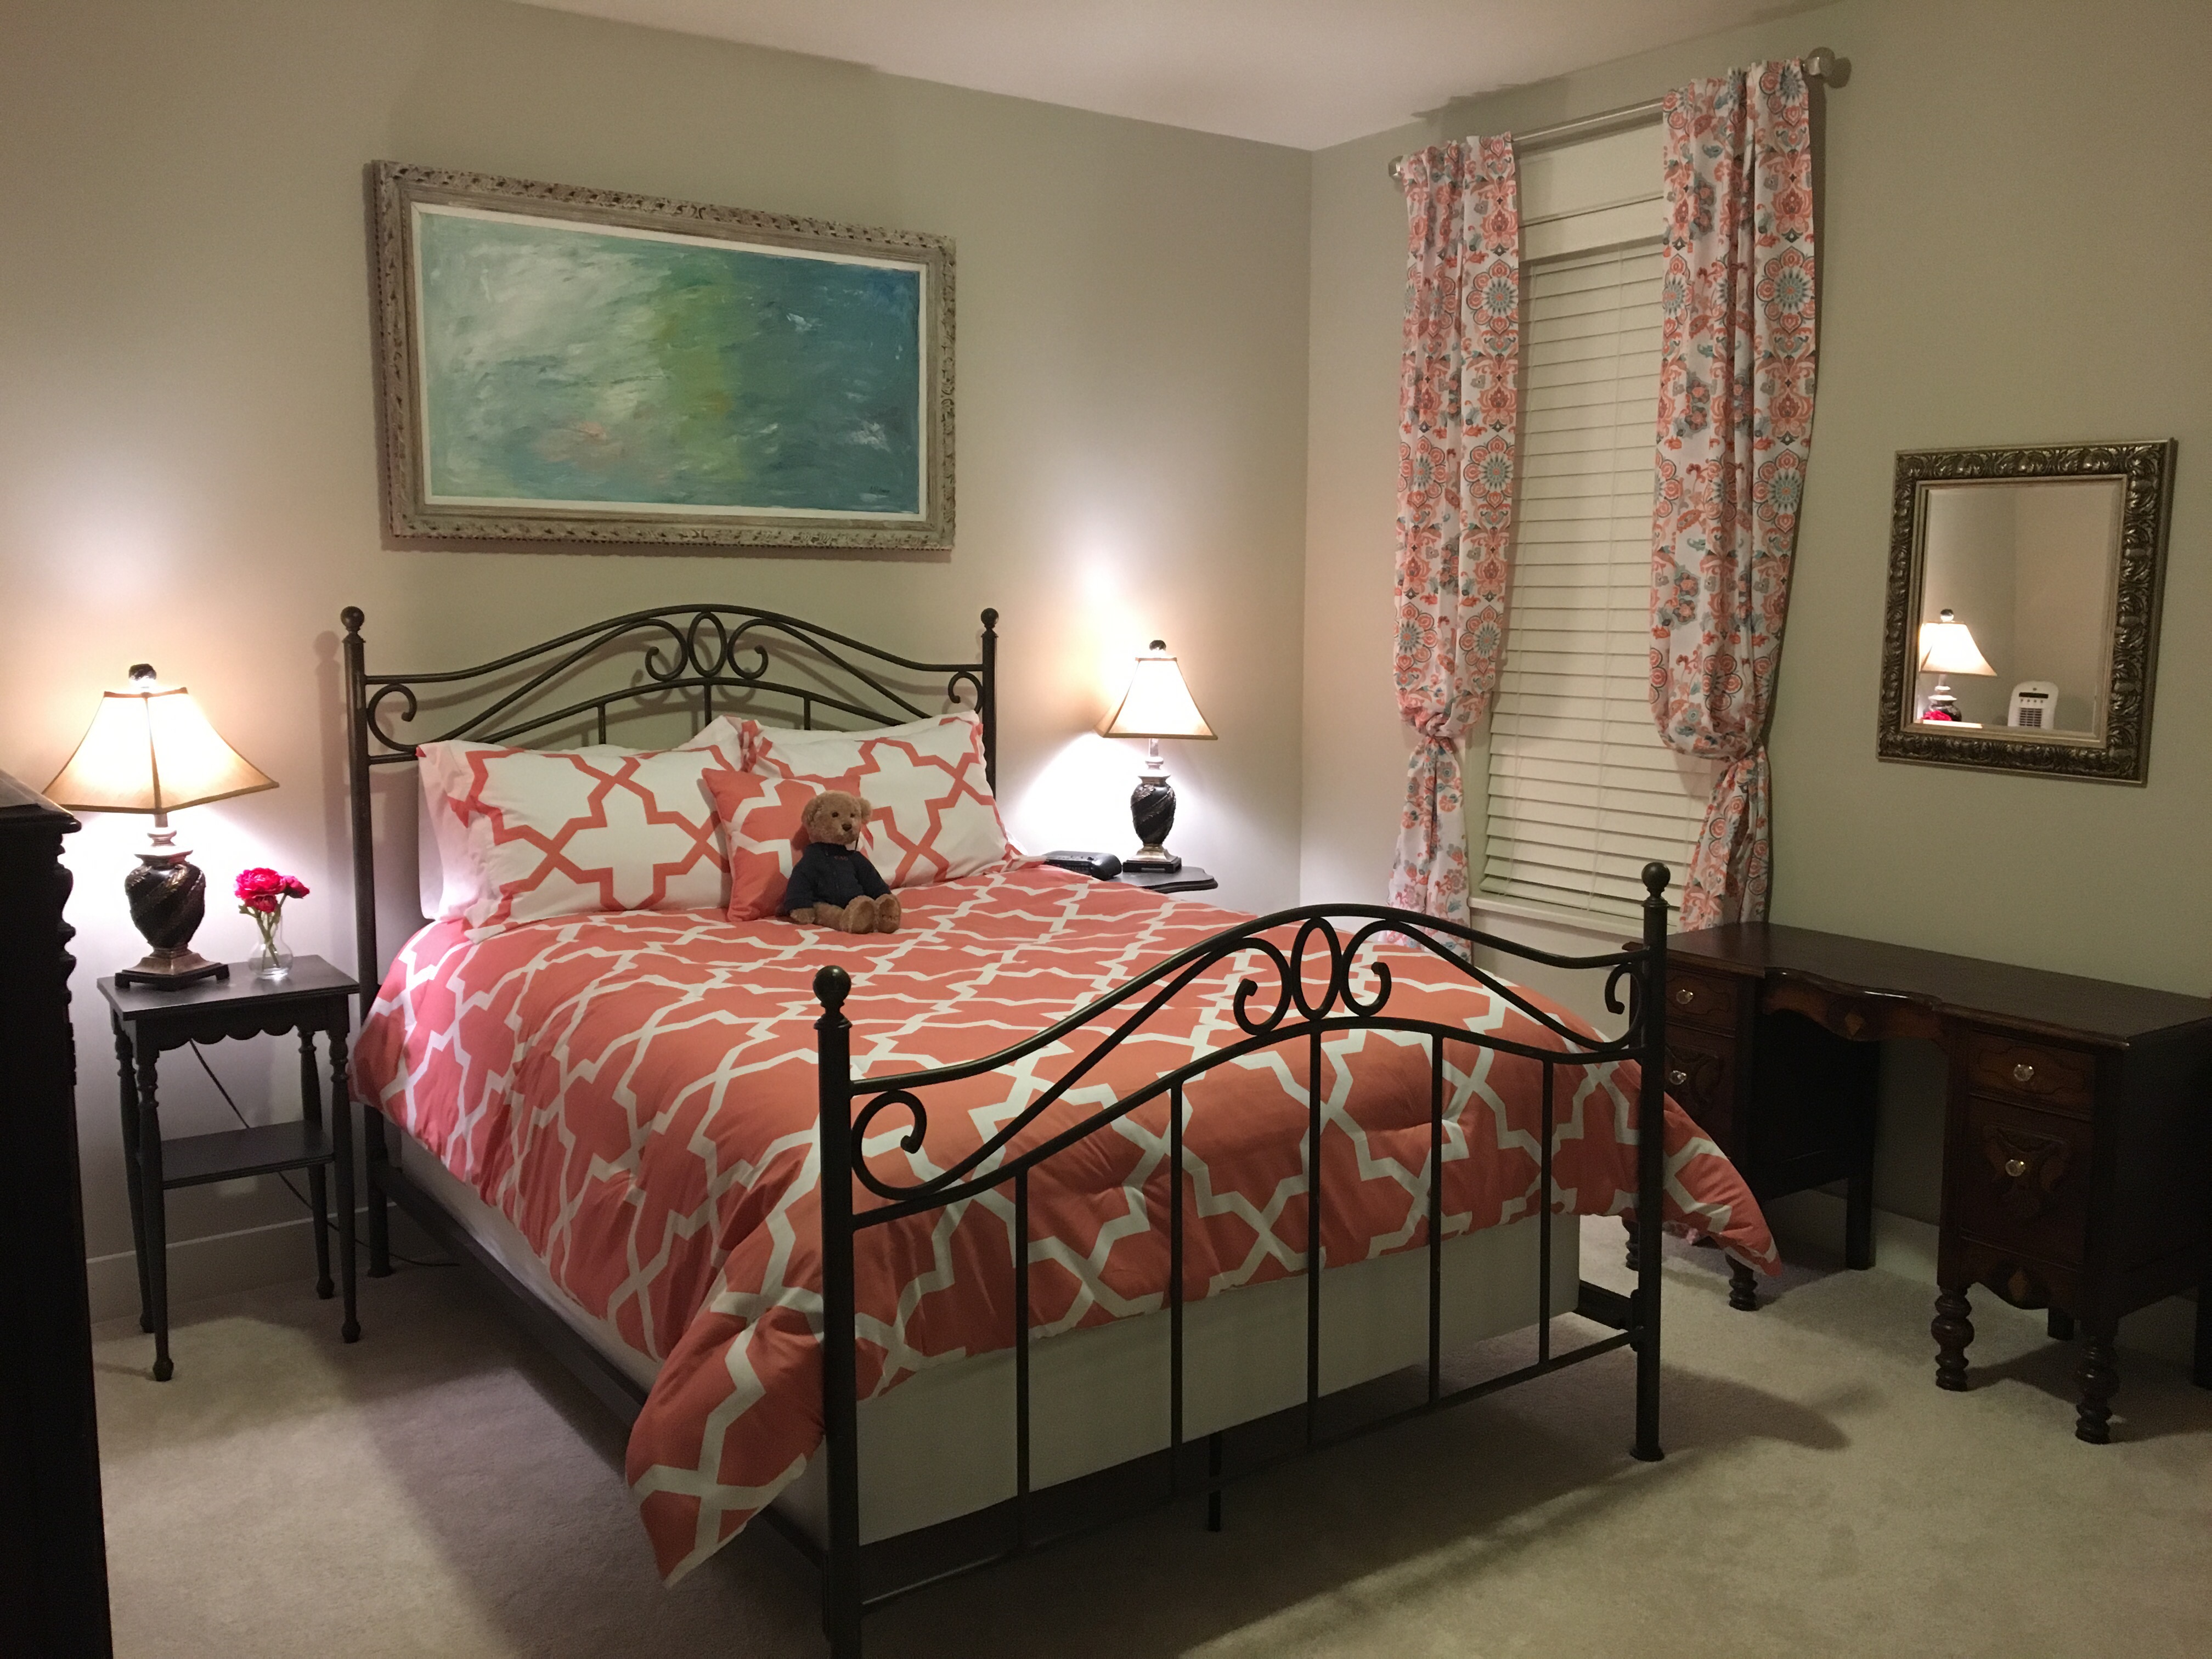
~k

It started with curtains

It started with curtains

Before we moved into the new house, we knew we would need new bedroom furniture.  Matt didn’t want to buy anything while we were still in the townhouse, since we had no clue what our new bedroom space would look like.  We ended up getting my old bedroom set from my mom and have had that for a few years now.  It was a decent size in the townhouse but we figured it would be too small once we moved.

We’ve been in the new house for over a year and the bedroom just doesn’t fit.  The furniture is too small and the room as a whole was feeling kind of blah.  I told Matt the time was coming for a makeover.  I will hopefully have a little money from my grandmother and I told Matt part of that was going to redoing our bedroom!  Well, I’m still waiting to see how much money I might have but the bedroom makeover is under way.  It all started with curtains.

I ran to Home Goods at lunch one day looking for a few more baskets for my closet.  I hadn’t planned to buy new curtains but while I was there I decided to see what they had.  I figured finding 6 curtain panels, in the right size, at Home Goods was probably impossible so I was SHOCKED when I found 3 pairs.  That I LOVED!  Needless to say the curtains came home with me.  We got the curtains hung and I was in love!  They were so light and airy and made the room feel much more cozy.  Of course, now the bedding didn’t match.  I found a set at Stein Mart I liked and mom was able to get me a discount.  With new bedding and curtains, the room was coming together.  I’d decided I wasn’t crazy about the pics I had over the bed though.  Not that that was a necessity at this point but I had causally started looking.

image2 (5)

The other day I ran to a junk store by my office.  It was recently purchased and the new owners have taken it upon themselves to start sprucing the place up.  When I first started going, it was a total hole!  Now it’s almost like a real store.  Anyway, while I was in there the other day I saw a painting when I walked in.  I glanced at it and kept moving.  As I was headed back to the front I noticed someone carrying it around.  I started talking to her and she ended up giving it back to me.  Whoops.  I really loved the frame but was a little disappointed the “painting” was only a print.  I ended up buying it with thoughts of removing the print and painting something myself.  I went as far as to find all the paint supplies I needed on Amazon.


I got the picture home and waited for Matt’s reaction.  He was very “meh” about the whole thing.  While he was playing golf on Sat morning I propped the new pic up above the bed and immediately decided it was perfect!  I hung it on Sunday and it really adds to the room.  The pics are kind of hard to get a good feel but so far everything is coming together beautifully!  Now we just need the big stuff, like new furniture!

image1 (4)

If you are interested in the bedside tables, you can find that post here.

Christmas 2015

Christmas 2015

One would have thought I’d be jumping at the chance to decorate the new house for Christmas however, that wasn’t exactly the case this year.  I couldn’t find my motivation, but I think I couldn’t find motivation because I couldn’t find my vision!  I had no clue what to do with the new house this year.  I knew I wanted candles in the windows and wreaths on the windows.

After Thanksgiving, I ran to Michael’s and picked up some garland for the porch.  I really wanted to use spot lights for the outside of the house but due to the elevation, we couldn’t get them to look right. So we ended up outside one night just putting white lights on the garland.  As it turned out, it looked good.

The house Christmas Eve. The neighborhood did luminaries.
img_5681.jpeg
The white tree.
img_5680.jpeg
The white tree topper. I found the gold topper and added a bow.

As the outside was coming together, inside was slowly getting started.  I think the tree was up for a week without any decorations, whoops.  Slowly I started to make my way around the house.  I purchased a 6ft white tree from Amazon in November that I planned to put in the dining room.  I bought a bag full of pink ornaments at our neighborhood garage sale back in the summer, so I needed a tree. 😉  Matt was not happy about the white tree, hehe.  I also had my dad build a rustic box for the dining room table.  I filled it with leftover ornaments, and it may still be sitting on the table because I love it!

img_5679.jpeg
Rustic box.

The stairs got some light garland I found at Kirkland’s on sale and the fireplace ended up with some greenery picks from Hobby Lobby.  The tree was put in the back corner of the living room and was slowly decorated.  It wasn’t my favorite tree so I’ll have to try harder next year.  My nutcrackers filled the tops of the built-in’s beside the fireplace.  Then I have to figure out what to do with my newly acquired buffet.  Mom gave it to me a few months ago and I still need to paint it but it’s currently on the back wall in the living room.  I added some wooden frames above it and put leftover wreaths in the middle.  This might have been my favorite decorating idea!  The frames will also be painted and I will put some pics from our last trip to London in them at some point.

The buffet with the framed wreaths!
Fireplace with greenery.

D7K_5991

I didn’t take a ton of pics this year.

~k

Flea market find!

Flea market find!

Matt and I knew that when we bought a new house there were various items that would need to be upgraded.  Our bedroom furniture is on that list.  We are currently in possession of my childhood furniture set.  However, this set did not come with bedside tables so a few years ago I bought some cheap side tables from Walmart.  We couldn’t have anything too large in our old room at the townhouse.  These fit nicely even though they were cheap.

Since we moved I’ve been randomly keeping my eye out for various pieces of furniture.  Hence the dining room table sans chairs right now. 😉 About two weeks ago I was on FB on one of the buy, sell, trade sites I follow and someone posted a set of small chests for $120.00.  I commented for dimensions and said I would be interested if the first deal fell through.  The next day I received a PM from the lady.  The chests were available, and they were just about the right size!  I im’ed Matt and he said “whatever”!  I PM’ed the lady back, asked if she would take $100.00 for the pair and the next day I went to pick them up.  They weren’t in perfect condition but they were in good condition.  I just needed to decide on a paint color and I was in business.

For a while now, I’d been looking at new chests.  The only problem was that most of the new chests were 1) more than I wanted to spend and 2) too tall.  Our bed is pretty low so we needed chests that were under 30″ tall.  Most new chests are several inches over 30 which I knew Matt would complain about.  The used chests came in right at 28″ tall which makes them only a few inches taller than the bed and not uncomfortable while reaching up from the bed.

The weekend I got the chests, Matt and I ran to Lowes to look at paint colors.  I ended up choosing Morning Fog by Sherwin Williams.  It’s a really pretty light greyish blue color.  I was a little worried there wouldn’t be enough contrast between that and the wall color but decided to just go with it.  First I primed the chests and drawers with Kilz.  Then over the next few days I painted the chests, and then the drawers.  Within a week I had everything done.  (Which was kind of shocking!) Originally I had planned to use the pulls that were on the chest and just spray paint them but then I realized almost all of them were pulling apart and Matt didn’t really think he could fix them.  I searched on Amazon and fell in love with some antique looking glass knobs but they were $17.00 for a set of 4.  I would need 12 and I wasn’t sure I really wanted to spend $50.00 on knobs.  In the end, that’s exactly what I ended up doing.  The chests were really cheap so I figured I could splurge a little on knobs.

For just over $150.00, I was able to get us new bedside tables and they turned out AMAZING! The knobs really add a little something and the color blends nicely with the room.  Seeing how well these turned out, kind of makes me what to buy the Hurdal dresser and chest from IKEA, paint them and add the same knobs. (Side note, we saw these at IKEA and they are quite large and sturdy which is the only reason I’m really considering them.) That would redo our whole bedroom (chests included) for under $1000.00.  I told Matt I’m not really ready to take on this project but it might happen soonish. 😉

image3 (3)
Before: Our small crappy little tables.
image2 (4)
The chests before, during, my knobs, and after.

Patience paid off!

Patience paid off!

For the past year I’ve been drooling over this one specific dining room table that I kept seeing on Pinterest.  Of course, none of the links listed where the actual table was from.  I searched high and low and one day I finally found a blog that stated where the table was from, Restoration Hardware.  I immediately went to their website and found the table I’d been lusting over was the Salvaged Wood Trestle Dining Table.  And then I found the price.  No matter how much I loved this table I just couldn’t (and Matt said no!) see spending that much on just a table.

copy-of-trestle-table-setting

I began searching for something comparable, specifically with the same or similar style legs.  I found a few that were similar but either they weren’t solid wood or they were out of my price range.  If i was going to spend $1500+ I figured I might as well just buy the one I really loved.  Here are a few similar ones I found: Harverty’s Avondale, the Randall from Wayfair (which is really cheap and mostly made of veneers), the Manor House also from Wayfair (which I can’t currently find online but was listed for $2500.00), the Arcadia Extension Table from World Market (again mostly veneers).

Once I’d decided I probably wasn’t going to find my table, in a price range I liked, I started looking at other options.  There is a wholesale store called Nadeau in Raleigh that has solid wood pieces from India.  A coworker and I would run over at lunch and look around.  I finally decided that I’d most likely just buy a table from there when the time came and while it wouldn’t be my RH table, I could probably find something with that similar rustic feel.

I started following Nadeau on FB and IG since they get shipments in quite frequently. And then last week it happened, my table on their FB page!  I freaked and immediately commented to see how much the table was listed for and how big it was.  They responded and I showed Matt.  The table was still a little more than I wanted to spend but it was THE table! I even waited another week before I went to check it out in person.  I was able to get the guy to hold it for the rest of the day so I could go home and measure our space.  Once we knew it would fit, I told Matt he had to go see it so on Saturday we ran to Raleigh to check it out.  The table is made of solid mango wood and 7’3″ by 3.5′.  Matt agreed it was nice and I bought my table.  It was delivered yesterday and I can say it is spectacular!  It looks beautiful in the space.  Now I just need chairs and a rug.  I’ve had the rug picked out for a few months now but I’ll wait to purchase it since the table was a little more than I was hoping to spend.  I’m hoping the rug will help me decide on what chairs to buy.  For now the dining room is coming together. 🙂

Empty dining room


With the table!


The rug I want to go under the table.


A tale of two doors

A tale of two doors

Right after Matt and I moved into the new house we had a really bad storm come through and our front door leaked.  You can read about that here.  That was 3 months ago.  Since then I’ve been waiting for my new front door.  While we weren’t happy that the front door leaked, it gave me the opportunity to actually get the front door I wanted.  When we bought the house, I had dreams of removing the grids from the front door and frosting it with our address in the middle.  However, the grids on our door were glued in and the builder said they couldn’t remove them.  I was totally bummed.

Anyway, fast forward to today.  It’s been 3 months and I am just now getting my new front door.  Somewhere in between the door leaking and our 2 month inspection, the warranty guy was let go.  So when it came time to sand down the foyer floors by the door and replace the door, the door went missing.  No one was really sure what happened to the door.  It was either misplaced or stolen which meant a new door would have to be ordered.  Last Thursday we got a delivery.  A new front door!  The CORRECT front door was delivered to the house.  The builder picked it up to have it painted and now I’m waiting for them to come and install it.  I was hoping they would be early but seeing as it’s after 9am, it doesn’t look like that’s going to happen.  Hopefully it won’t take long to replace the door.

image
This is the old door. You can see the silicone they put around the panel to try and keep the water out. I feel we are lucky it didn’t leak again.

Of course the guys didn’t show up to replace the door till closer to 10.  It look about 45 mins to get everything swapped out but I must say the new door is BEAUTIFUL!  I love it soo much!  I really wish I could leave the glass open but you can see straight up to the master at night.  The full pane of glass gives the house a little move charm, I think.  I know it’s not a huge difference but I’m really happy.

image
Old door on the left, new door on the right. SOO much better. I think the new door looks older with more charm. The glass is also a little wider.
image
From the inside. I had the door painted the same color on both sides.

As for frosting the glass, I realized last night the new door is tempered glass and the glass etching stuff won’t work on tempered glass.  I guess I’m going to have to use the spray frost.  This is not my ideal method but it’s also a little less permanent than glass etching.  Oh and I should mention the sheers I had covering the front door don’t work now because the area around the glass is covered and not boxed off.  Does that even make sense?  Anyway, my tension rods don’t have a place to fit now.  So we are totally ghetto and have suction cups on the glass holding the sheers.  Whomp!

~k

Craft room update

Craft room update

Hello, almost vacation!

Matt and I are planning a little trip to the beach for a few days.  I feel like I am in desperate need of a vacation.  Our last “real” vacation was two years ago to Jamaica.

So, let’s see, what have I been up to.  Well, I am still working on my craft room.  I think it’s going to be a work in progress for a while.  It’s been so freaking hot lately that I haven’t wanted to work on the stuff I need to finish, like painting my shelf brackets or my chandelier.  This past weekend it cooled down enough and I was able to get outside and spray paint my shelf brackets.  I bought the Ikea Ekby Gallo shelves while we were there a few weeks ago.  I knew I wanted to spray paint the bracket piece gold since gold will be my accent color. I bought some Krylon metallic gold spray paint (I think this is it) and it was the BOMB!  The nozzle swiveled and the push button was super smooth. No more spray paint hand cramp.  I used 1 can for both brackets.

Now that I have the shelving painted I need Matt to help me install them over my craft table.  Then, I need to start working on my chandelier.  It’s one mom had and is no longer using so she’s offered it up for my craft room.  It’s already goldish  but I want it to be a little more gold.  I think it will look amazing painted the same gold as the shelf brackets.

I brought my brackets and shelves inside last night so I could take some pics and I realized my shelves are the wrong size.  Whomp whomp!  The brackets are Gallo or something and the shelves are not. Total IKEA fail!  Thankfully the shelves were’t very expensive.  I’m sure I can find another place to use them.  I told Matt last night I would just have to run to Lowe’s and get a piece of wood that would fit.  While not ideal, this will actually allow me to paint the wood the same color as the table, chair and trim.  So it might actually look a little better.

IMG_5069.JPG IMG_5068.JPG

While we are on the craft room, I said a while back I would review the fabric I bought for my chair from Spoonflower.  Spoonflower is actually local, they are in Durham, and they print their own fabric.  This allows for hundreds and hundreds of choices you can’t get anywhere else.  I fell in love with several of their patterns and I couldn’t find anything close at other fabric stores.  Here’s my review:

They have tons of fabric choices you can’t find anywhere else.  They also have a variety of fabric types.  Since I was recovering a chair I bought their basic cotton fabric. This runs $17.00 a yard.  Not terrible considering it’s custom. I think it took less than a week for my order to complete and ship, which isn’t bad. The packaging arrived and it was pretty cute.  Now the fabric.  I can’t say I’m blown away with the quality of the fabric.  To me, it felt kind of “flimsy”.  It’s a very thin, lightweight fabric.  I was expecting it to have a  little more weight to it.  I have various other cotton fabrics in my stash and I don’t think this feels like quite the same quality.  With that said, I will say it washed okay and looks fine on my chair.  I’m not sure how it will hold up but this is also a chair I don’t plan to use daily.   I think the colors and pattern were what I expected and I was very pleased with that. Would I order fabric from them again? Maybe, but only if I couldn’t find exactly what I wanted and they had a pattern I liked. I think I would probably try to find something from Fabric.com first.  I only got their basic cotton so I’m not sure how the other fabrics feel. They may be a little nicer but they are also more expensive.  I went cheap. 🙂

IMG_4886-0.jpg IMG_4887.JPG

IMG_4889.JPG IMG_5070.JPG IMG_5072.JPG


The making of a craft room

The making of a craft room

When we picked our new house I knew I was going to make one of the bedrooms into a craft room.  Matt was getting an office and I wanted a craft room.  We had the space so I decided to use the bedroom next to the the master.  It’s the only bedroom not connected to a bathroom and I wasn’t keen on having a bedroom right next to our bedroom/bathroom so this was the perfect space.

For months I searched and searched for a desk.  I found one at Ikea but due to the shipping costs I kept looking.  Then I found one on Amazon that was similar and ordered it.  Thanks to UPS, the desk was left in the rain by our garage, not on our front porch, and the desk was ruined.  I shipped it back and continued the search.  I also realized that one and the one from Ikea would have been too small for the space so it worked out.

I still hadn’t found anything when my mom called one day to tell me that her work was getting rid of their display tables.  Employees would be able to purchase them for $20.00.  I knew it was just a wooden table but for $20.00 I told her to get me one.  Turns out it will work great for a craft table.

I decided to be lazy and not actually strip or sand the table down.  I bought some Kilz instead and used that as my base.  Next I painted the table with 2-3 coats of paint.  I decided to use our trim color since it wasn’t quite white.  I thought a bright white table might clash.  I’m really glad I used the trim color to be honest.  Everything flows nicely.

Since the table was going to be used for crafts I thought it might be a good idea to put a top coat on the top.  Boy, that was a mistake!  I bought a spray clear coat.  I did several light coats but the finish wasn’t glossy like it was supposed to but so I decided to put it on a little heavier.  Well the damn stuff turned yellow, the can said it wouldn’t turn yellow!  Grrr!  So I ended up having to sand the top down to the gloss off so I could then add another coat of paint.  In the end it turned out fine but it was kind of a pain.

Before, with Julio photobomb


Fast forward a few days.  The table has finally been painted and I ask Matt to help me get it into my craft room.  Well I didn’t measure the table.  Whoops.  After about 20 mins of trying every possible way to get the table in Matt decided it wouldn’t fit.  Okay so that’s not really an option.  I immediately told him to cut the feet off.  He was hesitant at first but we took the table back downstairs and on the front porch he sawed off the bottom few inches.  I found some casters to replace the feet with and I think everything will be fine now.  This will also allow me to move the table around should I need or want to.

The chair for my craft room has been a little less dramatic.  I found the cutest chair at the Flea Market a few months ago.  It just needed a little paint and some new fabric.  I’ve been on the hunt for fabric since I found it.

Over the weekend I was able to get the chair painted with the hope that it would make finding a fabric a little easier. Well today was the day.  I was going back through my fabric board on Pinterest and finally decided to order one.  I think it will look really nice on the chair.  It should be here in a week or so.  If I like the fabric, I’ll do a quick review on the fabric store I used.

IMG_4849.JPG
Chair before paint. Notice the brass tips on the feet. I’m going to spruce those up with a little more gold paint.


IMG_4858.JPG
Chair after paint. I need to add the gold.


craft chair fabric
Fabric for the chair seat.

I still have more work to do but this is the start.

~k


Bathroom Makeover

Bathroom Makeover

Over the past few years, Matt and I have slowly been updating our house.  We have replaced the carpet, upgraded all the lights, and painted everything but the 2 upstairs bathrooms.  I just cannot find the motivation to paint the bathrooms. But this is will have to happen soon.

A few weeks ago our bathroom lights started going out.  We had one of those Hollywood style lights over the vanity.  Well instead of replacing the 2 bulbs that had blown, I told Matt I’d rather just replace the whole light.  We’ve been racking up Amex points for a while now, so he ordered a few Lowe’s gift cards.  Before he left to play golf on Saturday he handed me the gift cards and told me to run to Lowe’s and “spend some money”.

We’d already looked at lights and had one picked out so when I went to Lowe’s I grabbed the light and globes.  Unfortunately they didn’t have the globes we’d originally looked at so I had to find new ones.  I might have also picked up a few more plants.  Whoopsy!  😉

Sunday, once we got up, Matt started working on the light.  When he took the old light down, he realized there wasn’t a junction box and had to run back to Lowes.  After fiddling with that for a while, he finally got it to work and he installed the new light.  We both really like the new light but it just emphasizes the fact that I HATE the mirror.  Originally we were going to buy a kit and frame it but the new light is so close to the top of the mirror and honestly, I want new mirrors.

The past couple of days I’ve been looking at my options and I finally found a couple I liked at Kirkland’s.  I called the store by my house but they didn’t have 2 of the ones I wanted.  I was told there were more at the Cary store so today at lunch I ran over there.  I had to search for the ones I’d seen online and in the process I found another one I really liked.  When I compared the 2, I realized the new one was a tiny bit taller and I liked the pattern a bit more.   They were both the same price so it didn’t really matter.

Now I get to go home and see how they look.  The verdict is still out as to whether 2 mirrors will look okay with just one light.  If we had plans to stay in this house I would have made Matt split the junction box so we could have had 2 lights but that seemed like a lot of work for a house we don’t plan to stay in long term.  I’ll post some pics once we decide on the mirror situation but here is a pic of the light and the current (ugly) mirror.

~k

20140521-151401-54841696.jpg

Ta Da!

Ta Da!

The bedroom is finally coming together.  Curtains are hung and I even found a pillow to match at Big Lots of all places.  Don’t get me wrong, I still am not really happy with the bedroom as a whole but more and more things are starting to come together.

The rest of my bedroom fix includes new furniture {which I’m not sure when that will happen}, Matt hanging the TV on the wall, and us finding a place that is NOT the dresser as a catch all.  Currently our dresser holds everything from a picture, to a vase, to a jewelry box, to watches, to dust, to receipts and trash.  You get the picture.  I just can’t find a direction to go with it so for now it is what it is.

20130805-142955.jpg20130805-143002.jpg

I’m so happy I was able to find a pillow that matched the grey almost perfectly. Hopefully it helps tie the curtains and bedding together. I even thought about trying to find a grey throw for the end of the bed. Maybe I’ll keep an eye out for one.

Happy Tuesday!

~k